
Introduction
Setting up a mall kiosk involves more than just picking a design and placing an order. You need to consider size, materials, functionality, mall regulations, and delivery timelines. Many first-time operators treat kiosk setup like buying furniture. They choose a unit that looks good, pay for it, and wait for delivery. Then the problems start. The kiosk does not fit the assigned space. The mall rejects the materials. The equipment does not fit inside. This guide breaks the process into five clear steps. Follow them, and you will avoid the most common mistakes.
Step 1: Check Mall Requirements First
Every mall enforces specific rules for kiosks. These rules cover maximum dimensions, approved materials, fire safety standards, and electrical specifications. Some malls also restrict certain finishes or require specific certifications for food-contact surfaces. The rules vary significantly between malls. Therefore, your first step is to request a copy of the mall’s tenant manual or technical requirements document.
Pay special attention to height limits, width restrictions, fire-rating requirements, and available power capacity. Write these numbers down and keep them accessible throughout the process. Without this information, you cannot design a kiosk that will pass inspection. More importantly, you risk ordering a unit that the mall will not allow you to install. For that reason, confirm all mall requirements before you do anything else.
Step 2: Define Your Functional Needs
Your product category determines what your kiosk must include. A food kiosk needs a sink, drainage, a work counter, and space for refrigeration. A retail kiosk requires display cases, shelves, a checkout counter, and secure storage. A service kiosk — for nails, lashes, or brows — needs workstations, client seating, tool storage, and sanitizing equipment.
Start by listing every piece of equipment you plan to use. Include coffee machines, refrigerators, display cases, and payment terminals. Then think about your staff. How many people will work inside the kiosk at the same time? Finally, consider your customers. Do they stand or sit during the transaction? These factors determine the minimum counter space, aisle width, and overall footprint you need. As a result, defining your functional requirements early helps you avoid a kiosk that is too cramped or too large for its purpose.
Step 3: Determine Size and Layout
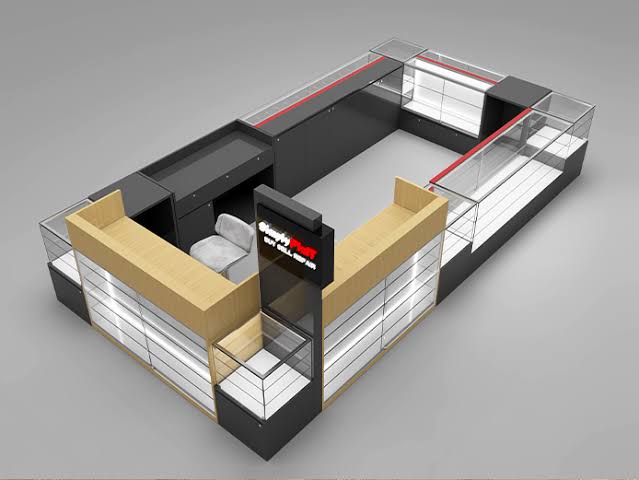
The mall provides a maximum footprint. Your functional needs define a minimum footprint. Your actual kiosk size should fall somewhere between these two numbers. Start with a simple overhead sketch. Show the counter, equipment placement, storage areas, and customer-facing sides.
Place displays on the outside where customers can see them. Keep work areas on the inside where staff operate. Leave enough clearance for customers to approach and browse without crowding. Mark all dimensions clearly — overall width, depth, counter height, and aisle space. This sketch becomes the basis for your supplier’s design work. A clear layout also helps you spot potential issues before production begins. Consequently, investing time in this step saves money and delays down the road.
Step 4: Select Materials and Finishes
Mall fire and environmental standards directly affect which materials you can use. Certain laminates and paints must meet specific fire-rating levels. Some materials are not approved for food contact. Others may not hold up to the traffic volume inside a mall.
Within these restrictions, choose materials based on your operation. Stainless steel resists rust and oil, making it ideal for food kiosks. Laminate surfaces are durable, easy to clean, and available in many colors. Painted finishes offer unlimited color options but require careful handling to avoid scratches. Your material choices determine how long the kiosk lasts, how easy it is to maintain, and whether it passes the mall’s final inspection. In short, never select materials based on looks alone — always check compliance first.
Step 5: Confirm Delivery and Installation Timeline
Production takes time. Delivery takes time. Installation takes time. Many operators forget to account for all three. Ask your supplier for a clear production schedule. Compare it to your mall opening date. Build in a buffer for shipping delays and unexpected issues.
Also clarify who handles installation. Does the factory send a team? Do you need to hire local contractors? If you hire locally, does your supplier provide installation instructions? Additionally, check the mall’s rules for construction hours. Some malls restrict work to nighttime or early morning. Finally, ask whether the mall requires a sign-off after installation. Knowing these details upfront prevents last-minute surprises and ensures you open on schedule.
Pre-Setup Checklist
- Mall requirements document obtained and reviewed
- Equipment list finalized
- Staff count and customer flow mapped
- Layout sketch completed with dimensions
- Materials checked against mall fire and safety rules
- Production timeline confirmed with supplier
- Installation plan finalized
- Mall sign-off process understood
Final Thoughts
Setting up a mall kiosk follows a clear sequence. Start with the mall’s rules. Then define your needs. Next, plan your layout and materials. Finally, confirm your timeline. Get the order right, and the process runs smoothly. Get it wrong, and you will face repeated delays, extra costs, and constant rework.
We design and build custom mall kiosks for food, retail, and service businesses. Our team works within mall requirements to deliver functional, durable units. Tell us your product category and space size, and we will create a kiosk that fits both.